Showing posts with label Pretty Pink Posh. Show all posts

Wednesday, April 10, 2019

Simon Says: No Designer Paper!

Hello crafty friends! It's Wednesday and that means it's time for a new Simon Says Stamp Wednesday Challenge!


This week Simon Says: No Designer Paper! The design team is featuring amazing Picket Fence Studios products!  It isn't a requirement to use them but if you have them we would love to see them!

Come join in on the fun, you have the chance of winning a $50 gift card to the fantastic Simon Says Stamp store!


I used the beautiful Lily Bouquet stamp set for my card today. I decided to color these gorgeous Lilies with my Polychromos Pencils.  I stamped my Lilies using my stamp positioner and some Gina K. Amalgam ink to do some no-line colouring. This was such a soothing process! 


Once I was done coloring my flowers, I added some Salty Ocean Distress Ink to the sides. I then gold embossed my sentiment (I needed an Anniversary card for my parents and felt this was perfect). The sentiment is a mix from both a Pink & Main set and a Sunny Studio set.

I placed my panel on a card base and used my 1/4 inch Corner Chomper on two of the opposing corners.


To finish off, I added my favourite flower embellishment Pretty Pink Posh Clear Droplets to the Lilies and some Pretty Pink Posh hearts above the sentiment.


Follow Simon Says Stamp on Instagram

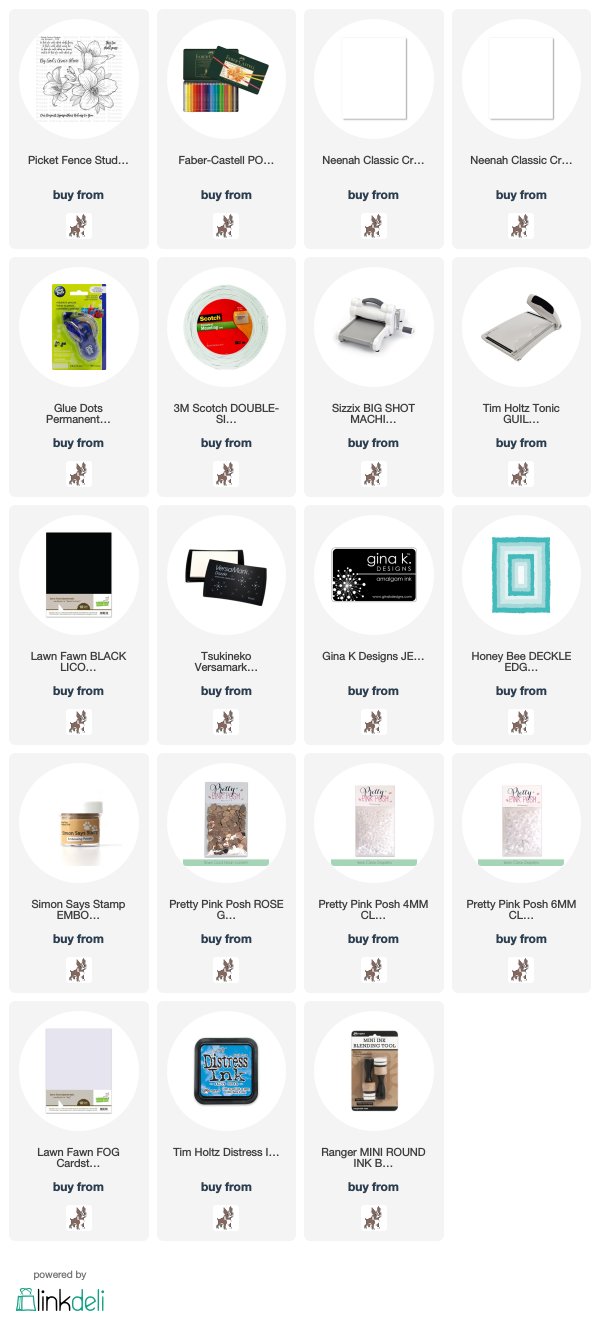
Thanks so much for taking the time! All products used are listed and linked below, affiliate links used at no extra cost to you!
Kim

Friday, April 6, 2018

Pretty Pink Posh Wild Roses

Happy Friday crafty friends! So happy the weekend is a couple of hours away! My local store has started carrying Pretty Pink Posh and I couldn't resist playing with this Wild Rose set!

I goggled wild roses and my inspiration picture is a little further down in this post, I wanted something a little different and bright!


I didn't have a specific vision for this card, I just loved the colors from the wild rose picture I found on google. So I pulled out my RV00, RV02, RV04 and Y00,Y11 and Y15 to mimic the colors below.


Once I finished the flowers I colored my leaves in YG21, YG25 and YG17 and die cut all of the images. I decided that a stark black and white background would be best for the bright flowers.


I cut a piece of Lawn Fawn black card stock to A2 size and then decided to use my Avery Elle Horizontal Stripes die with Neena 80lbs card stock. I really like the way the flowers look against that background. I then used some Tonic glitter paper and fun foam with StickIt sandwich to die cut the Pretty Pink Posh Thank You Script sentiment. The pink glitter works so well with the flowers.

I debated adding in the white circle back to the centre of the frame but felt leaving the middle black was fine. I am still on the fence, lol.


I put all of my elements together and topped everything off with the new Pretty Pink Posh Watermelon Jewels (I love all the jewel colors in this line!)

Thanks so much for taking the time!
Kim

Wednesday, January 31, 2018

Pretty Pink Posh Hummingbirds

Happy Wednesday crafty friends! Like many of you, I have been so anxious to get my hands on the Pretty Pink Posh Hummingbirds stamp and die set! I had such fun with these, I am in serious need of spring inspiration and they sure did that for me!


I wasn't sure about my background (the heart cover plate die is by Hero Arts from last year and the cloud stencil is by MFT) at first so I added a vellum overlay to soften the hearts and cloud mix.  I stamped my birds with Lawn Fawn Jet Black ink to use my Copic markers in a mix of pastels in the BG, BV, R and Y families. I added some dot detail with the darkest Copic of that color family and some black gel pen on the eyes for definition.


I then die cut some MFT stitched clouds from both vellum and Neena 80lbs card stock and also die cut the Hero Arts Wonderful (Stamp and Cut set) from Tonic glitter card stock and a StickIt and fun foam sandwich for added dimension (I like to die cut my glitter and fun foam separately to make sure I get the best cut from my glitter paper).

I put all of my elements on the card base, once I was happy with the placement I added two white embossed sentiments from black card stock (also from the Hero Arts Stamp and Cut set) on the top and bottom of the wonderful.  

I finished the project with a rainbow assortment of sequins by Studio Katia and gold die cut hearts from the CAS-ual Fridays Fun-Fetti. Most of the products used were purchased at the Butterfly Reflections Ink on-line shop.

Thanks for taking the time!
Kim


Friday, October 13, 2017

Avery Elle - Frosty Friends!

Happy Friday crafty friends! Weekend of work meetings ahead but I still get excited when it's Friday!  My project share today is another one from my wonderful World Card Making Day - Long Weekend that I so enjoyed!


It features the fantastic Avery Elle Frosty Friends set, I love the vintage feel of this set!  I started with an A2 size piece of Bristol paper masked off a "snow hill" to blend my sky (Kristina Werner inspired this background totally, she shared a project last week based on a sketch and I just loved it).  I used Picked Raspberry, Wilted Violet, Blueprint Sketch and a bit of Black Soot Distress Inks. As soon as I completed my blending I added some sparkling clear Ranger embossing powder over the entire sky. I repeated it twice and it's a shame you can't see well with the picture, it makes the sky look frosted and freezing! I then added some of my white Gellyroller pen to act as stars.

I stamped my images and decided to go with red and purple Copics, the sky inspired the addition of the purple. I colored my images and used the coordinating die cuts and added some more Gellyroller to the gloves and hat ribbon.  I then stamped the sentiment from the Avery Elle Snowflakes set with some new WOW purple sparkling embossing powder. Love the stuff it is so shimmery when you see it up close.

Once I placed my images on the card base, I added some grey shading to the bottom of the snowman and sign. Finished off with some Star Dust Stickles on the snow and the North Pole sign and some Pretty Pink Posh Clear droplets.

Thanks for taking the time!
Kim


Saturday, October 7, 2017

World Card Making Day!

Happy Saturday crafty friends! I love world card Making Day! Works out well that it's the long Thanksgiving weekend here in Canada and that the weather is grey and soon to be rainy! I never really need an excuse to hide and play in my craft room but today is a full day of crafting then turkey:)

I am following the fun on-line celebration today one of my morning projects is inspired by the first My Favorite Things challenge ROYGBIV - Rainbows!


My inspiration came from the MFT Celebrate die (which I just picked up this week). I die cut it from Neena with fun foam and had fun with my Distress Inks to create my rainbow.  I then felt these adorable Bitty Bears would pair perfectly :)  The stitched scallop border die is also from MFT as is the diagonal background stamp I used with clear embossing for the black card stock accent panel.  

Not only are those bears too cute, they are very quick to color with my Copics. I used the matching dies and put my card together. I finished off my project with Sparkling Clear Sequins!

Going back to check on more challenges! MFT will have four total today I believe! Happy card making!

Thanks for taking the time!
Kim


Monday, September 11, 2017

Wplus9 Modern Anemones

Happy Monday crafty friends! I finally had a nice relaxing weekend that did not include working for my day job! So I allowed myself some much needed downtime in my craft room.

I don't know about you but I am hanging on to the last of summer as much as I can so I was inspired by the Wplus9 Modern Anemones set.


I stamped a bunch of the images from the Modern Anemones set on Neena Solar White 80 lbs card stock so that I could use my Copic Sketch markers.  I researched anemones on-line and decided to go with pink.  I then die cut a panel using my favourite Avery Elle Wonky Stitched Rectangle die.  I placed my flowers and then decided to die cut my Awesome sentiment from Neena along with StickIt and Fun Foam for added dimension.  I used some Distress Ink in Picked Raspberry in an ombré effect and then stamped the You Are from Avery Elle on top.

I finished of my project with some Pretty Pink Posh clear droplets.

Thanks for taking the time and have a great week!

Kim


Sunday, August 20, 2017

Happy Hippos!

Happy Sunday crafty friends! So nice to be back on the Butterfly Reflections Ink. blog with you for today :)

My project today features MFT products that can be all be found in the Butterfly Reflections Ink. shop!


But I mean, look at those hippos! I just fell in love with them! This is the Happy Hippos stamp set by MFT colored with my Copic Sketch markers - I wanted a really whimsical card and what better than flying Hippos, Lol. For the background "colored" clouds I used the fantastic Cloud Stencil by MFT, I love this stencil! Instead of a typical blue I decided to go with Distress Inks in Picked Raspberry, Spiced Marmalade and Mustard Seed to match my Copic accent colors.

For the "white" clouds I used the Lawn Fawn Puffy Cloud borders. I put my elements together and added my favorite Pretty Pink Posh Sparkling Clear Sequins. I finished off by adding a little grey Copic marker under my bottom elements to ground them.

For those of you interested in any of these products go on over to the shop, if any items are not in stock simply select the Notify Me option. Vanessa rocks at re-stocking quickly.

Thanks for taking the time!
Kim

Saturday, August 19, 2017

You Flamin-go girl!

Made this one for the current challenge over at the Lawnfawnatics Challenge Blog - Custom Sentiments!

One of my favourite things about Lawn Fawn is the puny sentiments, they are always such fun!


I started with a Neena Solar white 80lbs panel and used a mix of Wilted Violet, Picked Raspberry, Spiced Marmalade and Mustard Seed Distress Inks and blended them on my background panel.  I then splattered bronze Distress Paint on the panel.

I die cut a second panel to make my sandy hill and used both Antique Linen and Gathered Twigs Distress Inks. I then toped off the hill with my Gathered Twigs Distress Marker and my white Gellyroller for definition.

I stamped out my elements from Lawn Fawn's Flamingo Together and the trees from both the Critters from the Past and Life is good sets.  Took out my trustee Copic sketch markers to color my images. I put the base together and then gold embossed the sentiment on a Lawn Fawn sentiment banner.


Go take a look at the challenge it is such fun!
Thanks for taking the time.
Kim


Tuesday, August 15, 2017

You're so Tweet!

Happy Tuesday crafty friends! This is my last week of a wonderful four-week vacation, boo. Although I am ready to put the flip flops to the weekends and get back to reality!

I finally got my hands on this older Clearly Besotted stamp set - Some Birdie Loves You! It was backordered for so long!


I am just in-love with these birds! The illustration of the stamps is, in my opinion, the sweetest! I used my Copic Sketch and looked up love birds on google to get the right coloration. I then fussy cut my images. For the background I used my favourite MFT could stencil, this is a must-have in my craft room! The foliage is an older Memory Box die as is the rainbow.  

Once my card was put together with these elements, I stamped the music notes from the Some Birdie Loves You set and white embossed the sentiment (same set) on a Lawn Fawn banner.

I finished my project off with Pretty Pink Posh clear droplets!

Thanks so much for taking the time!
Kim

Thursday, May 4, 2017

Lawnfawnatics Challenge #4

Happy Thursday! I have been so busy at the office, many changes have increased my workload and unfortunately I have been a little absent from my crafty time!

I had time to play to unwind and I made this card to enter into the Lawnfawnatics Challenge #4 - Black/White and Bright.


For brights I thought what better then the Fab Flowers stamps and dies by Lawn Fawn! I started by stamping those with some bright die inks then pulled out my favourite black and white stripped pattern paper.  I then decided to die cut a half circle and lay my flowers around the side.


I white heat embossed my sentiment on Lawn Fawn Black card stock and added some of the pattern paper and some pink as well.  Finished it off with some Pretty Pink Posh clear drops and some Nuvo Drops in the centre of the flowers. 


Thanks so much for taking the time!
Kim


Monday, April 24, 2017

Awesome Rainbow!

Happy Monday crafty friends! Kim with you this morning and I am sharing another rainbow inspired project! Weather is so beautiful and that is inspiring me with color! Lots of color! All of the products used are available on the Butterfly Reflections Ink shop!


I started by die-cutting the Concord and 9th Floral and Flutter flower die with several colors of card stock. I added shading with Distress Inks to the edges of the petals. I then cut my Neena 80lbs card front to a little narrower than the 4.25 width and die cut the edges with the Lawn Fawn Stitched Border Dies.


I then felt the card needed a black sentiment for it to really pop so I chose the Neat & Tangled Awesome die and I accompanied that with an Avery Elle "You Are" sentiment from the Simply Said Hugs set (with some craft surgery to mix and match the words).


I put the card together and had to add my favorite Pretty Pink Posh Crystal Clear sequins and a mix of Nuvo Crystal and Jewel drops in the centres of the flowers!

Thanks for taking the time, have a great week! If any of these products are out of stock simply select the "notify me" option Vanessa stocks really quickly!


Monday, April 17, 2017

Rainbows and Distress Inks

Happy Easter Monday crafty friends! I was lucky enough to have a four day weekend break to spend with family and friends. Very relaxing with lots of love, laughs and yes some craft time :) I hope you all had a great Easter weekend.

I felt like playing with Distress Inks for this project! All of the products can be found in the Butterfly Reflections Ink. Shop


I started with a piece of Tim Holtz Watercolor paper and loosely painted on a rainbow of Distress Inks (Mermaid Lagoon, Cracked Pistachio, Twisted Citron, Squeezed Lemonade, Abandoned Coral, Picked Raspberry, Wilted Violet) once the panel dried I went back in with some (Blueprint Sketch, Mowed Lawn, Fossilized Amber, and Seedless Preserves) to add depth.


I then decided to use the Wplus9 Color my World paint tubes and colored them and the paint brush with my Copic Sketch markers and fussy cut all of my images.  I have always loved the Lawn Fawn You Color my World sentiment so I white embossed it on Lawn Fawn Black card stock. I placed all of my elements on the Distress panel and cut the excess from my Lawn Fawn Stitched Circle die.


I also painted the tip of the paintbrush with my white Gelly Roll for the illusion of paint. Once my card was put together I added a rainbow of both 4mm and 6mm Pretty Pink Posh sequins.

If any of these products interest you just follow the links and they will take you directly to the shop! If any products are listed as out of stock, simply select the notify me option. Vanessa stocks quickly!

Have a great week!
Kim


Monday, April 10, 2017

Kraft and colored pencils!

Happy Monday! Kim with you this morning and I am sharing an anniversary card today made with one of my favorite mixes - colored pencils on Kraft card stock! These are all products you can find in BR shop!


I started with a piece of Kraft card stock and stamped my flowers and leaves from Winnie & Walter's In Bloom - Addie's Garden (I am obsessed with this set lately) set with Kraft colored ink and I colored them with my Prismacolor pencils.


I guess with Easter around the corner, my color palette became what it is! When it came time to add a sentiment (this is an anniversary card for my parents :)) I, again, turned to my current obsession, the Lawn Fawn Happy, Happy, Happy Lawn Cuts and stamps.  I stamped the anniversary sentiment on a piece of Perfectly Plaid Rainbow paper and die cut the Happy out of lavender card stock and stamped the "happy" on top in Versafine Onyx Black.


I then felt that the left side looked slightly empty so I pulled out my Avery Elle Butterflies set and stamped one of them on Kraft paper and colored it in shades of purple and lavender.  I fussy cut it to pop it up on the base panel (again, I didn't buy the dies and it's a set I use often...) and I added some dot detail. To finish everything off I added some Pretty Pink Posh Sparkling Sequins and some Nuvo Jewel Drops in Lavender, Pink and Yellow.

Thanks so much for taking the time! If you are interested in any of these products they all have direct links to the shop and if anything is backordered just select the notify me option. Vanessa stocks very quickly!

Have a great week and I will see you Easter Monday!
Kim


Monday, March 27, 2017

Watercolor with Altenew

Happy Monday crafty friends, Kim with you this morning with a no-line Altenew watercolored flower! Products can all be found in the Butterfly Reflections Ink shop :)


I bought a new set of watercolor paints and I wanted to practice so I pulled out one of my favorite Altenew flower sets Beautiful Day. I always love to practice colouring on Altenew florals due to the size of their stamps.  

I started by stamping my image using Distress Ink in Old Paper and slowly building my color. Once I finished my flower I fussy cut it once it was dry (moral to this story, always by the dies...lol)  I then used some accompanying foliage stamps from the Beautiful Day set along with the leaves from the Winnie and Walter In Bloom Addie's Garden set.

I stamped my sentiment in a mix of black and lavender inks using my Misti to mask and be able to double stamp the sections. I cut a matching card base from my Canson watercolor paper popped up my card sprinkled some Pretty Pink Posh Sparkling Clear sequins and I was done!

If any of these products interest you and the stock is limited please select the notify me button, Vanessa rocks at re-stocking very quickly!


Have a great week!

Monday, March 20, 2017

Spring Flowers with Lawn Fawn

Happy first day of Spring crafty friends! Kim with you on this Monday morning and I am sharing spring flowers with happy everything wishes with products that can be found in the Butterfly Reflections Ink shop!


When the new Lawn Fawn release was launched, like many of you, I wanted the whole release especially the fun critters! This Fab Flowers set however is probably one of my favorite Lawn Fawn sets ever! I stamped my flowers using my Misit in various Lawn Fawn and Hero Arts inks. I used LF ButterLF Peachy KeenLF GuavaLF Minty FreshLF MermanLF Celery StickHA Fresh Lawn and LF Freshly Cut Grass I then die cut my images with the coordinating Fab Flowers dies.

I started placing my flowers and decided to die cut two panels the yellow in the back is from the Lawn Fawn Watercolour Wishes 6x6 paper pad. I die cut both panels from the Lawn Fawn Stitched Rectangles (largest of the small rectangle set) and started placing my flowers in the bottom corner.  I then decided to die cut one of the three Happy, Happy, Happy Lawn Cuts  and chose the "Everything" sentiment from the Lawn Fawn Happy, Happy, Happy stamp set (such a versatile sentiment set). I white embossed the sentiment on Lawn Fawn Narwal paper placed all my sentiments and finished it off with some Pretty Pink Posh Clear Droplets both the 4mm and 6mm.


I added some dot detail with both my white and black gell pens.  I am happy with the way this springy card turned out. Makes me happy to think we shall have flowers, grass and full-on spring soon enough!

All of these products can be found in the shop, if anything is out of stock sign-up to the "notify me" in the product description. Vanessa is very quick to replenish and this helps to know what products are on wish lists!

Have a great week!
Kim

Monday, March 13, 2017

Monday Rainbow MFT Hugs!

Happy Monday, Kim with you here this morning sharing a rainbow themed card featuring MFT product from the Butterfly Reflections Ink store!!!

It was such cold weekend I decided to hibernate a little a find some well deserved quiet time in my craft room!


I absolutely wanted to use the Furever Friends stamp and die sets by My Favorite Things, there is just something about the MFT images that I love. After colouring my images with my Copic markers, I decided I wanted an anchor for them and what better than the My Favorite Things Die-Namics Big Hugs die! I decided to die cut it from the new Lawn Fawn Perfectly Plaid Rainbow 6x6 papers, I am so going to need to order more of this paper pack!


I then decided to die cut the bottom of my base panel using the My Favorite Things Die-namics Stitched Scallop Basic Edges 2 and repeated it with some more of the same Lawn Fawn pattern paper. I put the card together and added some Pretty Pink Posh Sparkling Clear Sequins (new to the BR shop!) and a variety of the Nuvo Jewel Drops.


And for today's post, I decided to offer a few different views of my project!

Have a great week!
Kim 

Friday, November 18, 2016

CFC161 - Be Thankful with a discount!!!

Time for a new challenge over at Cas-ual Fridays :) The theme is Be Thankful! American Thanksgiving is next week and what a better time to reflect and be thankful then now! We celebrate Thanksgiving in October here in Canada but I would do a repeat anyday!

But first, Michelle has a wonderful discount for you over at Casual Fridays Stamps to celebrate this time of year!


Go on over, the savings will last while supplies do or until November 30th!!

Now on to the challenge:


I used stamps from the Thanks and Wallflower sets and embossed them in gold (love gold embossing this time of year) I then watered down Distress Inks in Ripe Persimmon, Aged Mahogany and Peeled Paint and painted on top of the embossing.  I had never used this color mix and I like it! I then turned it into a shaker card with a mix of Pretty Pink Posh Sequins.

Join us at the CAS-ual Fridays Challenge blog for the chance to win $25 worth of CAS-ual Fridays Stamps and, drum roll please... Michelle with double the prize if you use CAS-ual Fridays stamps! 


Thanks so much for taking the time!
Kim

Friday, November 4, 2016

CFC160 - Kraft

Time for a new challenge over at Casual Fridays :) What a better challenge then a Fall type color challenge! This time you must feature Orange, Brown and Kraft! I struggle with orange, so this was a fun project for me to get me out of my comfort zone!!


I do however, love Kraft paper! For this one I kept my flowers and leaves from the Pretty Posies stamp set pretty plain by stamping them with Chocolate Fudge MFT ink. Although the details on those beautiful flowers are not plain, I just love them! I then stamped the smallest butterfly from the Casual Fridays Butterbows stamp set with MFT Tangy Orange ink. I was worried about the Hybrid ink on Kraft but I love the way the orange really shows nicely! I used the Thanks die from the Smiling Fri-die set and die cut it on Orange and Brown paper and mounted the sentiment on some fun foam for dimension. I put the card together then stamped the Many sentiment from the Thanks stamp set. I finished it all off with Pretty Pink posh sequins.


Join us at the CAS-ual Fridays Challenge blog for the chance to win $25 worth of CAS-ual Fridays Stamps and, drum roll please... Michelle with double the prize if you use CAS-ual Fridays stamps! 


Thanks so much for taking the time!
Kim

Tuesday, September 6, 2016

Lawn Fawn - Jump for Joy it's almost fall!

I don't know if any of you feel this way at the end of summer, but finding my card mojo seems to be difficult!!! I got my new Lawn Fawn products over the last few weeks and took the long weekend to try and find my crafting mojo! 

Fall is my favourite season and this new collection suits me just fine!!!


Felt good to get back into my studio and get my hands dirty with some Distress Inks! :) I used the new Jump for Joy stamps and dies as well as the Leafy Tree Backdrop (portrait).  I die cut one panel from the 6x6 perfectly plaid paper and a second from watercolour cardstock. I applied a mix of brown Distress inks to the tree then sprayed some water for the splotches, I then re-applied a bit more Distress Ink to give it more depth. I did the same for the sky background (blue inks) and the "grass" hill. I glued my tree onto the full plaid Leafy Tree.  I stamped my critters and leaves on Neena 80lbs and coloured them with Copics. Put the card together and decided to make a shaker out of it with a mix of sequins!

Thanks for taking the time!
Kim


Monday, June 6, 2016

Simon Says Stamp Flickr Challenge - Summer!!!

It's all about summer over at the Simon Says Stamp Flickr Challenge :) This card is so representative of summer for me. Vacation during the regular year is near impossible so I am lucky to have a month over the summer.  We love to go to the beach with friends of ours and this year is no exception!


Ironically, I used the Warm Christmas Wishes stamps and dies by Simon Says Stamp minus the Santa in shorts! I Copic coloured all of my images. For the background, sky, water and sand I used Distress Inks. For the sky Tumbled Glass and a Touch or Mermaid Lagoon, for the water Salty Ocean and Peacock Feathers and the sand is a mix of Antique Linen, Gathered Twigs and Ground Espresso and some Distress Markers for the accents on the sand and the shadows. The seagulls are from a Lawn Fawn set and the sequins are Pretty Pink Posh!

Thanks for taking the time!
Kim