Showing posts with label MFT. Show all posts

Monday, January 7, 2019

Birthday Snow Buddies

Happy Monday crafty friends. Sharing a fun birthday card featuring the Ready, Set, Snow stamp set by My Favorite Things!


These critters are the sweetest! I started by stamping and coloring my images with my Copics and used the accompanying dies.  I wanted to use the three of them on this card so I die cut my Neena panel with the largest Lawn Fawn Stitched rectangle (A2 size). 


I then took my MFT Hills and Drifts Stencil and some Salty Ocean Distress Ink and ink blended my slopes about 3/4 of the panel. I then used some Tumbled Glass Oxide Ink for the sky and added some snow using my Simon Says Stamp Falling Snow Stencil and some glitter paste for a light snow effect.

I decided on this fantastic Simon Says Stamp Happy Birthday die so I die cut it from Tonic Specialty Mirror card stock. I also die cut the bottom of the panel so I could inlay the die. 


I added my images to the panel using foam tape and added some gel pen detail on the eyes and the accessories.

This was a fun one to put together!
Thanks for taking the time, all products listed and linked below. Affiliate links used at no extra cost to you!
Kim


Sunday, July 22, 2018

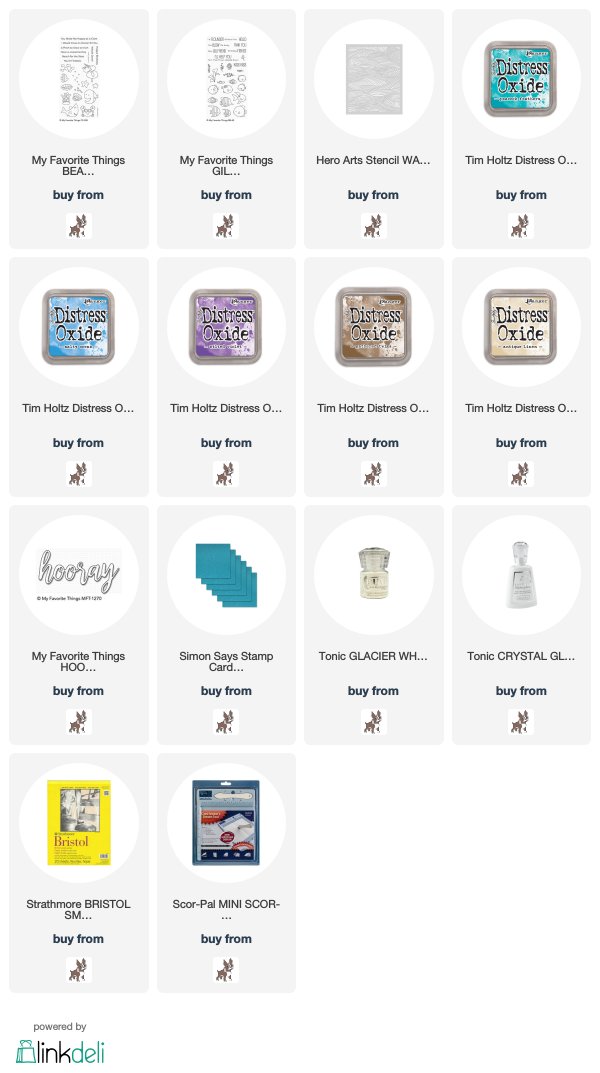
MFT Beach Buds

Happy Sunday crafty friends! I am currently on vacation and therefore posting at odd times lol! Had some time this morning so I am sharing this one layer three panel card featuring MFT Stamps, Distress Oxide Inks and Zig Clean Color Real Brush Markers.


I started by cutting my Bristol Smooth Cardstock to 5.5 x 12 and marked at 4 inches on the longest side.  I then stamped all of my images on the panel as well as on masking paper. I cut all of my masks and placed them on my fish. I masked the bottom of the ocean with PostIt tape and then used the Hero Arts Waves stencil with a mix of Salty Ocean, Peacock Feathers and Wilted Violet Distress Oxides. I removed the stencil and went over the panel again with the same inks but with a light hand to soften the background.


I used my Distress Sprayer to add some fun texture and it also added to the "water" feel.  I then removed the mask for the bottom and place it where the ocean meets the "floor" and used Gathered Twigs and Antique Linen Ditress Oxide Inks. Once the inking was all done I used my Zig Clean Color Real Brush Markers and colored all of my images.


Once all of that was complete I white embossed the fish bubbles and took away some of the color in the centres with my water brush. To make the look a little more dimensional I added Nuvo Crystal Glaze to the bubbles. I chose the MFT Hooray die with a mix of black cardstock and Simon Says Stamp Teal Glitter cardstock. I scored my lines at four inches with my Score-pal and folded it over. I finished off the project with some white gel pen detail.

All of the products used are linked and listed below!
Thanks for taking the time!
Kim

Monday, May 28, 2018

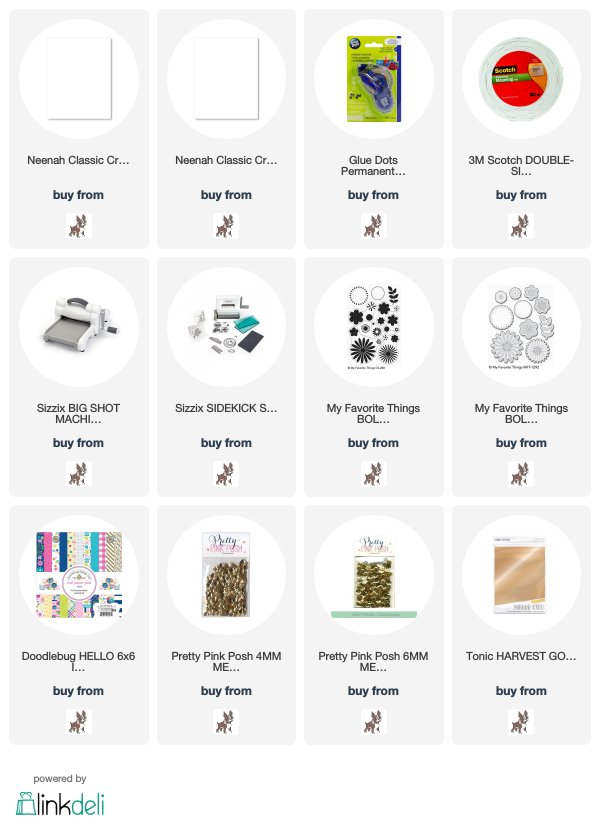
Celebrate with MFT and Doodlebug

Happy Monday crafty friends! I was away for work and back yesterday and I needed to unwind so I pulled out my MFT Bold Blossom stamp set and decided to play!


My inspiration for this project was the gorgeous Dooblebug pattern paper! Polka dots are my absolute favorite and this paper had my little heart go pitter patter. 


I started by stamping my MFT flowers with a mix of Catherine Pooler inks that matched the colors of the pattern paper and die cut them with the coordinating dies. 


I decided that a matching gold sentiment would be so pretty with the gold dots so I die cut the MFT Celebrate from gold Tonic Mirror card stock and some fun foam for dimension. I decided to use one of the MFT scalloped border dies for my panel.


I glued my pattern paper on the card base. I then assembled the flowers and sentiment on the top panel. I placed it on the card base with foam tape for added dimension and I topped everything off with some Pretty Pink Posh gold sequins!

Thanks for taking the time all the products are listed and linked below.


Monday, April 30, 2018

MFT Bold Blossoms

Happy Monday! Last day of April and I am hoping it really brings May flowers! I am in love with the MFT Bold Blossoms stamp set from their last release.


I die cut a Neena Solar White 80lbs panel with my Wonky Stitched Rectangle die to use as my base panel and pulled out my Catherine Pooler Inks.  The quality of these inks made this card so easy and it took about 25 minutes.  I stamped my flowers and I overlapped them, didn't bother to mask anything.  


I wanted rainbow order (or as much as possible) so I started with the largest bloom and just went in a circular motion until I had the right coverage for the large MFT Hugs die. Once that was complete, I die cut the Hugs into the panel and I also die cut some black fun foam to give the sentiment dimension and a hint of shadow.


I white heat embossed the sending you sentiment from an older MFT set on black card stock and glued it to my "hugs". I finished the project by adding some Pretty Pink Posh Sparkling Clear sequins.

Thanks for taking the time and have a great day!
Kim

Monday, April 23, 2018

Rainbow Turtle!

Happy Monday crafty friends! Spring has sprung - at least it finally has in Montreal! I decided to play with these sweet new MFT products for a fun rainbow project!


I used the Too Cute Turtles and A Tweet Hello for this project.  That turtle is too sweet! I stamped my images on Neena Solar White - 80lbs paper to use my Copic markers. Aside from the rainbow turtle, I also colored the butterflies in rainbow order. Once that was finished I used the accompanying die cuts.


I finally got my hands on the Pretty Pink Posh Peek-a-Boo die and I had to use it to feature the turtle. I die cut the white panel and I die cut the back of the pattern paper that I wanted to appear when the die was cut open.  I also die cut the pattern part with a circle die just to be able to glue it to the back of the panel with more ease. Before I opened and glued the Peek-A-Boo die I embossed the main panel with the We R' Memory Keepers 3D polka dot folder. I then cut open the Peek-a-Boo and placed the pattern paper on the back.


I placed my turtle and then adhered the panel to the base card with foam tape.  I then placed my other images along with my MFT Hooray die and the accompanying sentiment from the Too Cute Turtles :) To finish I added some Studio Katia Iridescent Bubbles!

Thanks for taking the time!
Kim

Wednesday, January 24, 2018

In love with Otters!

Happy Wednesday crafty friends! Had the chance to spend some quality time in my craft room last weekend and I decided to pull out my MFT Otters.  For those of you that don't know me, I am a huge animal lover and should probably be running an animal refuge! One particular (besides dogs, of course) is otters. I am simply in love with otters and would love to give one a good home (much to my husbands trauma, lol!)

I tend to purchase any otter set on the market but this guy from the My Favorite Things Otterly Love You set is by far my favorite!


This project began after I played with some of my alcohol inks and one of the backgrounds became my waves die cut with the Mama Elephant Ocean Waves Trio dies.  I then used another Mama Elephant die (Madison Avenue) for my frame and background. I used Salty Ocean Distress Oxide for the sky and sprayed it with my Distress Sprayer for texture.

I then used my Copic Sketch in E71, W3, W1 and WO for my Otter. I also colored some of the fish from the same set with simple coloring.


I put the card together and decided on the Mama Elephant Hello Friend Script Creative Cut and used my new obsession Tonic Glitter paper.  I die cut three and stacked them for dimension and then glued them to the background.  

To finish the project I scattered a mix of Studio Katia jewels and Hero Arts Ocean sequins. I have been making many friendship cards, I guess winter has a way of letting you know to send out some happy mail!

Thanks for taking the time!
Kim


Wednesday, December 6, 2017

Blush and Red Christmas

Happy Wednesday crafty friends! I haven't posted yet this week because my embossing gun died an untimely death on Sunday right in the middle of my Christmas card/tag production! Boo, lol. I ordered another Hero Arts heat tool (that's my favourite) and I ran out for a back-up on Monday evening. So happy, you never know how useful your tools are until they are gone... 

Made this one from some new MFT and Memory Box products from this year.


I am loving the new tonic mirror papers. I have picked-up every color and I will have to renew after I finish my holiday projects.  For this one I paired the red and blush (flat colored) card stock and die cut them with new Memory Box stitched snowflakes. Once I decided on the snowflakes the large MFT Merry Christmas stamp seemed like the natural choice.

I die cut my MFT background panel from Whip Cream card stock (also by MFT), I am using this card stock a lot this year. I then used my Ranger Red Glitter embossing powder for the sentiment, I love the effect of the red glitter with the blush and red snowflakes.


To finish off my project, I used some Rose Gold Pretty Pink Posh sequins and some pink gems. Once they were glued in place I used my Red Berry Nuvo drops and my Rose Gold Liquid Pearls on the centre of the snowflakes and around the sequins.

Thanks for taking the time!
Kim

Wednesday, November 29, 2017

MFT Joy

Happy Wednesday crafty friends! Today I am sharing projects featuring products from MFT's November release. I must say that these products are my favourite of the holiday season. I had so much fun with them that I made five projects all similar but a little different for some of my dearest friends.


Most of the products on all of these cards are by MFT. The Joy sentiment which I love, was die cut from a sandwich of fun foam, StickIt and Tonic mirror paper for all four in different colours.


The large MFT snowflakes were a mix of glitter and mirrored paper or gilding flakes (the blue and silver) and the green is Hero Arts glitter embossing powder.


The accompanying sentiment is from The Ton Stamps (I recently placed my first order with them and I love the products). The background die is also by MFT and it is by far my favourite of their large dies.


The blue is card is made from Neena Solar white and the three others are from MFT Whip Cream card stock.

All the sequins are from Pretty Pink Posh. Once I started, they were very quick to make.

Thanks for taking the time!
Kim


Monday, November 27, 2017

Carlyle Holiday Card 2017

Happy Monday crafty friends! I have been a little off the grid lately due to my large annual holiday card order.  Carlyle Construction (based in Montreal) orders bulk cards from me annually for their customers (I am very thankful to have them :). This year we decided on one model which is a shaker card. I have been busy filling this order and I am glad to say I am done! Yay!


It is a shaker card so they were a little longer than my usual but so worth it, I am so happy with the way they turned out! There is a massive mix of companies for this project.  I will simply list the products and companies used for these cards.

Paper: Lawn Fawn Narwal, MFT Silver Glitter Paper
Die-namics by MFT Frame
Lawn Fawn Snow Stamp (inside base card)
English sentiment by Avery Elle
French Sentiment by Lime Citron
Snow on transparency by Avery Elle
Inks: Hero Arts Unicorn White (Inside)
StazOn White on the Transperancy.
Sequins Pretty Pink Posh and a few specialty sequins mixed in.

I think that covers all of the products used!
Thanks for taking the time!

Saturday, November 11, 2017

MFT Happy Pawlidays for Butterfly Reflections!

Happy Saturday crafty friends! So happy to be with you today on the Butterfly Reflections Ink. Blog! I am deep into my holiday cards so I am sharing a fun one with you today featuring MFT products that can be found in the Butterfly Reflections Ink. Shop :)


My inspiration for the project was the puppy from the new MFT Happy Pawlidays set and I colored the pup like my little BFF Duffy :) I then went through my MFT stash and decided to use the accessories (carpet and pillows) from the MFT Merry Christmoose stamp set.  I stamped the accessories on Kraft card stock and colored them with my Copic Sketch markers. I then decided to opt for a Kraft background.


For the background I decided that I wanted a wallpaper effect so I used the Lawn Fawn Argyle Background stamp with some Judikins sticky embossing powder to add some gold Nuvo gilding flakes. I then cut a piece of wood pattern paper for the floor.  I placed my colored images on the background and decided I was missing some accessory elements so I stamped the ornaments and gift from the Happy Pawlidays set on Kraft, colored them and then used the accompanying dies. I fussy cut the other elements so they would be seamless on the scene but I felt that the dies for the ornaments was fine. I then embellished them with my white and stardust Gellyroller pen.


I opted for the beautiful Joy die from the newest MFT release for the sentiment (love this die). Once all of my elements were glued to the card base I really felt that the little "Duffy" needed the Lawn Fawn bubble with the bone from the Christmas Dream Stamp set lol!

I then added glossy accents to the ornaments, the dogs nose and eyes and the buttons on the middle pillow.  Thanks so much for taking the time! If any of these products interest you they are available a Butterfly Reflections Ink. If there are items out of stock simply press the notify me option. Vanessa is really quick about re-stocking!

Thanks for taking the time and have a great weekend!
Kim

Monday, November 6, 2017

Winter Rose on Kraft!

Happy Monday crafty friends! I hope you had a great weekend with some time for crafting :)

As I mentioned in my last post, I ordered some Windsor and Newton Gouache following a tutorial by Dawn from WPlus9 during the Online Card Class, Making Merry.  I really did not need a new colouring medium, lol! But the fact that it paints so beautifully on dark card stock made me have to try it! You really should check out the Online Card Classes they are fantastic.


I decided to try the Winter Rose Bouquet by WPlus9 on Kraft card stock, the last project I had completed with these was a much smaller image. I enjoyed using the gouache much more on an image of this size.  I am pretty happy with the way it turned out for a second attempt with the gouache.  I purchased the starter 10 color pack and mixed the colors to get better variations.  

I didn't want the sentiment to detract from the painted flowers so I opted for the new MFT Joy die with some green mirrored card stock also by MFT I believe. I also added some gold detail to the flower centres with my Gellyroller pen.

Thanks so much for taking the time and have a great week!
Kim

Wednesday, November 1, 2017

Dashing Deer

Happy hump day crafty friends! Winter temps are starting to hit Montreal this week, we have been so spoiled with warm weather up until now. So it is time to start thinking about holiday and winter wishes!

I usually love MFT releases but October's of this year is by far my favourite and it wasn't only because of the sweet pups!


I really love the Dashing Deer set, these critters are all so sweet.  I stamped all of the images from the stamp set because I just wanted to color them with my Copics. The card design came after, lol! Once I had decided to place them in a forest, I decided to pair them with a Birch Tree stencil (will have to add the company later, I must find where it came from).

I die cut my background panel using the Avery Elle Wonky Stitched Rectangle die. I then masked off a "snow" hill and decided to use Simon Says Stamp Fog ink (light grey) to use over my stencil to give a snowy forest effect with the birch trees.


I then added some snow with my "snow" marker and used my heat tool to help it puff up. I then lined the snow with Star Dust Stickles for shine. I placed all of my Critters on their "assigned" snow banks and then added grey shading underneath to ground them.

I decided on a sentiment from the same set. I embossed the sentiment on Tonic flat red mirrored paper. LOVE this paper. I then adjusted the largest of the MFT Stitched Fishtail Sentiment Strips to be a smaller size to properly accommodate the size of the sentiment. 

I finished by adding snow dots to my background using a Star Dust Gellyroller pen, I like the subtle effect it offered. Once my sentiment was placed on the card I added the greenery for an added fun element. I used an Avery Elle light grey card base, I felt it went well with the Fog ink from the trees.

Thanks so much for stopping by, I love your comments so please feel free.
Kim

Friday, October 27, 2017

Fall Tone on Tone Birthday card

Happy Friday crafty friends! Any crafting plans for the weekend? I am hoping to lock myself into my craft room at least for a bit :)

Today's card was inspired by a tutorial May Park provided for the Online Card Classes "Making Merry" class.  I am never able to follow the classes "live" due to work, so I catch it when I can and this project really inspired me for this tone on tone birthday card.


I started by picking the Lawn Fawn Raspberry card stock for my panel and card base. I simply love Lawn Fawn card stock, by far my favourite and this colour makes me smile!  I then decided to pull out some old Paper Smooches stamps that I had in my stash for the leafy/floral background.  For the ink colour I chose the Hero Arts Raspberry Jam dye ink. I placed my stamps using my Misti stamped one side then flipped my panel and stamped the second side.  

From one of the same stamp sets I took the "berries" or three dots and stamped them using clear embossing ink and added gold embossing powder.  I then die cut the MFT Celebrate die with gold mirror paper (with fun foam and StickIt for dimension). I stamped the Happy Birthday sentiment from the Mama Elephant set that was a free gift with purchase during their 5-year birthday sale in VersaFine Onyx Black Ink. Popped the strip up with some foam tape.

I finished the project with a scattering of gold Pretty Pink Posh sequins.
Thanks for taking the time and have a great weekend!
Kim

Wednesday, September 20, 2017

Rainbow Elphie Selfie

Happy Wednesday crafty friends! It is summer all over again here in Montreal and it makes me happy! So, to hopefully add a smile to your face on hump day here is a bright card featuring Lawn Fawn and MFT.


I love the Elphie Selfie set by Lawn Fawn from their spring release of this year.  I love me some Lawn Fawn critters and for some reason this is the first time I use this set!

I was having fun with this card so I figured why not make a whimsical fun rainbow scene.  The stencil is from My Favorite Things - Radiating Rays and I used a rainbow mix of Distress Inks on the background.  I then wanted to mute the colors, so I opted for a piece of vellum.  

I then colored my images from Elphie Selfie with my Copics. I used the coordinating dies and stamped my greeting on the vellum with VersaMark ink and white embossed it.  Then thought, well, If I am going whimsical lets just add some Lawn Fawn Puffy Cloud borders on the top and bottom.

I then put my card together and finished it off with some hearts from the CAS-ual Friday's Fun-Fetti!

Thanks for taking the time!
Kim

Wednesday, February 8, 2017

Shellabrate!!!

I had such fun making this card! I am in love with sea turtles, anytime I travel and the city has an aquarium I have to go only to see the sea turtles! So when I saw this set by Waffle Flower on the Butterfly Reflections on-line shop I had to have it for me!


I started with a piece of Strathmore Bristol paper and used a mix of Tumbled Glass, Salty Ocean and Faded Jeans with some masks that I freehand cut to make my waves.  I sprayed the paper with my Distress Sprayer, once that dried I took a Tim Holtz/Sizzix Stencil (Dot Fade) and added a bit of Nuovo Tanzanite Glitter Paste (LOVE that stuff!). The Tanzanite has a mix of blue and lavender glitter, so pretty! I then stamped and coloured my sea turtles with my Copics. I wanted a shaker card so I stamped my sentiment on the Acetate using my StaZon white and I used my Misiti to be able to re-stamp for the best impression.  

The outer frame is by MFT and I cut it from MFT Lavender Glitter paper. I used many different sequins in blue, lavender and clear.

Thanks so much for taking the time!
Kim

Friday, January 20, 2017

Cat Birthday Card!

Quick post today! I have a tradition of making birthday cards for my family from my pets. I have two fantastic dogs and one crazy cat.  It was my husband's 40th birthday this week and the family cat is really attached to him. Dogs to me and he has a cat! lol 


This stamp is from a company that is new to me Dare 2B Artzy. I picked it up because the cat made me think of our cat Tigrou (French for Tigger).  I colored him like my Tiggy!  The stamp set is called Purrfect Day. The border die is by My Favorite Things... Love this set of border dies and I want to pick up the new die-namics set like this in different shapes.  The silver glitter paper is also by MFT the hearts are by Lawn Fawn. Have a great day, finally Friday!!

Thanks for taking the time! 
Kim

Monday, January 9, 2017

MFT Baby Tags

Happy Monday! This is Kim and I am so very excited to be sharing my first post with you for Butterfly Reflections Ink! This is making my first day back to work after a two-week break a happy one! I am sharing baby gift tags today, one of my friends is expecting and not sure what she is having so I made one of each!


I used my We R Memory Keepers Fuse Tool for the first time and loved it! I cut my own Tim Holtz watercolor paper to the size of tag I wanted (2 3/4 x 4 1/4) and cut the edges with my trimmer.  I stamped my sentiments that are by Lawn Fawn Hello Baby with VersaMark ink and used white embossing powder. For the girl tag I used a mix of Spun Sugar, Picked Raspberry and Abandoned Coral Distress Inks and for the boy tag I used Peacock Feathers, Cracked Pistachio and Twisted Citron Distress Inks.  I sprayed both tags with some water and dabbed it off. I then stamped my images by My Favorite Things Snuggle Bunnies for the girl and Magical Dragons for the boy.  I colored my images and then fussy cut the dragon (should have bought the dies)  and die cut the bunnies . I then glued them to my tags and fused my plastic (left an opening to add the sequins, in hindsight I would have left some margin room on either side for a little give to add the sequins).  The sequins are from Tayored Expressions for the girl tag in Snow Flurries and for the boy tag by Lucy's Cards in Mint.

Thanks so much for taking the time and I will be back next Monday with another project!
Kim

Wednesday, December 21, 2016

My Favorite Things - Polar Bears!

The following project is a card that I made for the daughter of a good friend.  She loves scene cards and these polar bears by MFT fit the bill perfectly!


I used many different companies to build this card. The frame used to die cut the base panel and the subsequent layers is by Avery Elle (Wonky Stitched Rectangle).  The mountains are by Mama Elephant and the snow hill is by Lawn Fawn.  I coloured my bears, the ice and background trees with Copics then put the entire scene together and popped up my bears with foam tape.  I die cut a few MFT hearts and uses Christmas Red Stickles on them. I finished by stamping my sentiment by Papertrey Ink and adding some Pretty Pink Posh sequins!

Thanks so much for taking the time!
Kim

Tuesday, July 12, 2016

No line Copic Yellow Rose

I have been away for work, it was nice to get home and back to my favourite stress break! I have been practicing no-line colouring in different mediums. This one was coloured with Copics.


The rose is by a company called Deep Red it is a couple of years old and I though with the detail would be a good stamp to do no-line. The leaves are from a Mama Elephant set and the bold sentiment (which I love) is by My Favourite Things along with the hearts.

Quick post but I hadn't posted in a while and I really like the way this card turned out.

Thanks for taking the time!
Kim

Tuesday, June 28, 2016

MFT Written in Watercolor

I am loving this MFT Written in Watercolor sentiment set! I paired it with the Pretty Posies stamp set, this is a different card for me but I like the way it turned out!


I double stamped the sentiment in black and a grey to give the shadow effect to make the sentiment really pop.  I then added some of the accompanying elements from the Pretty Posies in different aqua and purple die inks.  added some sequins to finish it off (of course) and that was it. Very quick card to put together!

Thanks for taking the time!
Kim